To permanently get rid of lake muck, lay breathable landscaping fabric over the muck and cover it with 6 inches of sand. The fabric compresses the muck over time while the sand creates a stable, usable lake bottom. We’ve used this method on hundreds of Michigan inland lakes over the past 40+ years and it holds up for decades with virtually no maintenance.
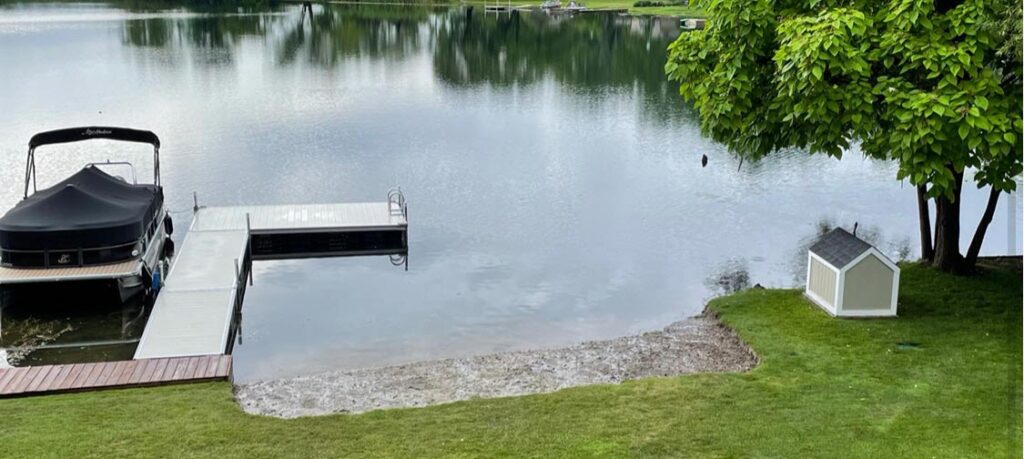
A muck free, stable, and secure lake bottom is one of the most overlooked and important parts of owning a home on any of Michigan’s beautiful inland lakes. Not only does it provide a safe swim area for both kids and adults, it also offers a multitude of features that can make your waterfront more functional and enjoyable all year round. While we do offer our permanent muck and weed removal service, we felt providing the correct process for you all would benefit anyone wanting to tackle this on their own.
Benefits of a Muck-Free and Stable Lake Bottom:
- A safe and stable swimming area
- A great place for water games (volleyball, etc.)
- A stable place to put your skis, wake boards, or get on a tube!
- Shoreline access for small watercraft (jet skis, paddle boats, and more)
- A wonderful spawning habitat for fish
- Provides a great fishing area
- Makes dock installation a breeze
- Creates a stable, everlasting, and low to no maintenance lake bottom
- Easily check and clean watercraft
- Easy installation of watercraft hoist
In this article, we are going to walk you through our process of getting rid of lake muck and building your very own stable lake bottom that will permanently provide your family and friends with countless hours of fun and enjoyment during our beautiful Michigan summers on the lake!
How Big of a Job Is It to Mitigate Muck and Build a Stable Beach?
Many people think the process of creating a great beach is to simply add sand. With over 40 years in the business, we can assure you this is never the case and that it’s always wise to do your due diligence!
Creating a stable lake bottom and beach from scratch is by no means an easy task. It will take a lot of hard work and persistence. You are going to want a crew of 2-4 strong individuals who are capable of lifting and moving large amounts of sand and material at a time. Wet suits are highly recommended, as extended time in the water can leave you with a chill. The job will also require a great deal of patience, as the ever-changing weather rarely provides us with consistency. Waves, wind, currents, and ice can all displace your efforts, so timing of the project will be everything.
Once you’ve got your plan in place and a date narrowed down, it’s time to begin designing the size and shape of your beach, as well as estimating the cost and materials needed!
Tools & Materials Needed:
Shovel
A good shovel is an absolute must. We like to use flat bottom shovels or even transfer shovels for moving the sand, as it allows for maximum efficiency per scoop and saves a lot of time over the course of a job.
Wheelbarrow
Plastic wheelbarrows need not apply. If you are going to be doing the job yourself and saving a lot of money, it’s best to invest in quality tools like a metal wheelbarrow that has either solid wood or composite handles. A plastic garden barrow simply will not hold up to the weight and stress applied when hauling beach sand. Something like this would work great!
Five Gallon Buckets
These are used in the sanding process and need to be strong and sturdy. Honestly, our go-to buckets are the orange ones from a very famous big box store! Most buckets will do, just be sure they can manage the weight of sand without cracking and you will be good to go for this project.
Quality Landscaping Fabric
A high quality landscaping fabric that is breathable is paramount to a successful muck mitigation project. The fabric needs to allow for gasses being released underneath as the muck decomposes and compresses under the new sand. It also has to last in a wet (underwater) environment, so choosing a good fabric is of utmost importance.
Weights or Posts to hold the Fabric in place
Metal fence posts are our go-to choice for securing the fabric in place when adding sand. Some people successfully use weights or other items to hold it in place. It’s really up to you and what you are comfortable with.
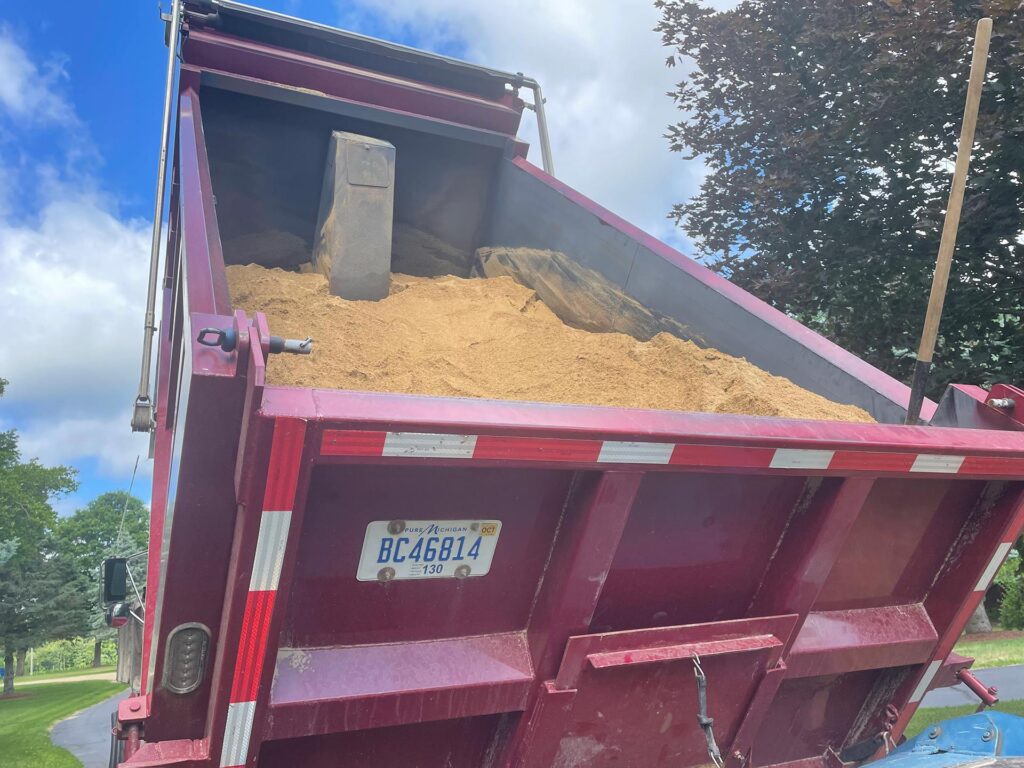
Sand
Finally the sand! There is much more to sand than most people know, and the various types, mixes, and sources can greatly affect the longevity of your waterside beach improvement project. If you’re not sure what types to use for your lake, we’ve created a guide to choosing the right beach sand to help you out. If you need any additional guidance, feel free to give us a call when making your selection as we’re always happy to help out!
The Process
1. Measure the Size and Shape of Your Lake Bottom Beach
The first part of muck mitigation is to evaluate the size and area of the lakeside beach you are looking to stabilize. Some things you’ll want to consider are the depth of the water, slope, and the placement of the beach in relation to the dock. You may even want to remove the dock and use the entire area, it’s really up to you!
Once you have determined the size and shape, you will need to lay out some markers and take measurements to determine the square footage of the final project. This will provide guidance in how much fabric and sand to purchase prior to starting.
We feel it’s a good idea to add an additional 5-10% onto your final numbers to factor in the slope and contour of the lake bottom you’re working with. This way in the event of a miscalculation, you will either have just enough, or if your numbers are spot on, a slightly thicker sand bed.
2. Creating the Foundation
Using the measurements you have taken for the shape and size of your beach area, you now need to determine the square footage. To calculate this number, you will need to multiply the length times the width of the area. If you do not have an evenly square area, you can break the shape into smaller squares and then add them together to get a closer estimate of the total space. The final square footage will be the area and the amount of landscape fabric needed for your base foundation. Keep this number close at hand, as it will come in handy when you prepare for and order your beach sand.
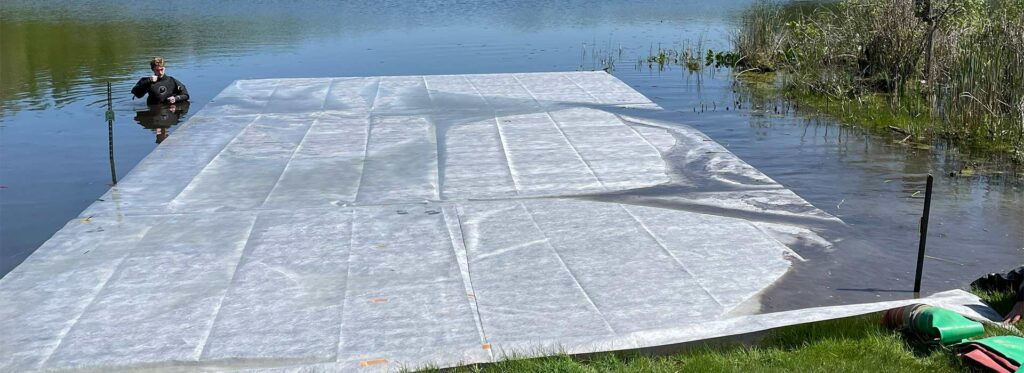
Now that you have the total square footage and area of your waterside beach, it is time to purchase, cut, and place your landscaping fabric that will become the bottom layer or foundation of your new muck-free beach. There are really only two ways to do this, and we will bullet the steps below!
The Sew Method (Recommended)
- Find a large, flat area of grass that is larger than the beach area you are working on.
- Using some sort of weighted item, stakes, or string, create the outline of your area.
- Carefully unroll and lay out the landscaping fabric in strips until the entire area is covered.
- Sew together the landscape fabric with a waterproof thread. This will ensure that your fabric shape will not breakdown over the decades it will spend underwater.
- Once everything is connected, it’s a great time to cut any odd shapes or corners if you have any. Most people just make a square or rectangle.
The Overlap Method
- Start in the water at one end of your desired beach area and measure the length.
- Unroll and cut a matching length of landscaping fabric.
- Place the fabric under the water and cover the first end of your beach.
- Move to the new inside end of your fabric and repeat the first 3 steps for the next length. When laying the fabric over the muck, make sure to overlap the previous fabric strip by about 3 to 4 inches on the long side.
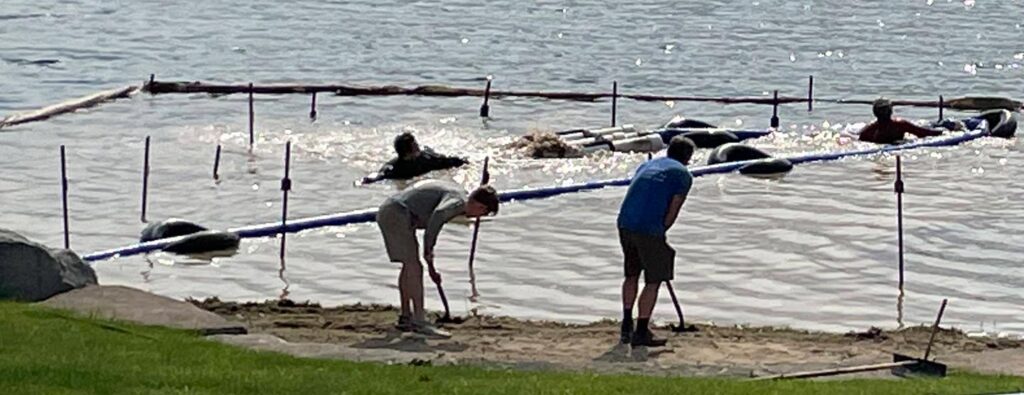
– IMPORTANT – Anchor The Fabric
Once you have decided on your method of placing the fabric, you will need to anchor it to the lake bottom so it will not move when applying your beach sand. If the fabric moves during beach sanding, the stabilizing process will most likely fail and parts of your beach will wash out over the coming years. We suggest using a weight, or some kind of stake at the corners and about every 8 feet around the edges to hold it in place. It’s also important to make sure you tighten the fabric as you go to ensure a smooth bottom.
3. Ordering The Sand
The first stage of sanding is to find the volume of sand needed. You are going to want enough sand to cover your lake bottom beach to a depth of six inches. Now is a great time to pull out the measurements you took earlier for your fabric foundation and calculate how much sand you will need to order.
The best way to calculate the sand needed is to take your length and width measurements and divide them by 3. This will give you your length and width in yards. Next, multiply the new yard length by the new yard width. This will give you your total area in yards. Take the total area in yards and divide it by .16. The resulting number will be the amount of sand you need in cubic yards.
If you don’t want to do the math yourself, you can visit this sand calculator page to get your number as well! Now that you know the volume of sand needed, you can place your order and have your sand delivered!
4. Sanding the Beach
The final stage of the process to get rid of muck and stabilize your lakeside beach area is to sand it! Sanding is technically one of the easiest parts of the job, while also being the most laborious part. Sand is a heavy material and weighs in at just over 1.3 US tons per yard! With an average sized beach area of 60 x 30, you will end up using roughly 32 yards of sand (41.6 TONS), so be prepared to put some sweat equity into your beach!
Once your sand is delivered you are ready to begin. Be careful and use precision when placing the sand on your foundation and make sure to spread it very evenly. If you do not spread the sand evenly, you can easily sink a corner or area of the fabric into the muck. If this happens, you will end up with a puckered foundation that will drastically change the shape of your beach as well as potentially destabilize the final product!
- Start by bringing a wheelbarrow of sand down to the waterfront and filling your buckets.
- Carefully walk the sand to the edge and while gently sifting it out of the bucket make sure to spread it evenly over your fabric.
- Slowly move inward and over your area and evenly coat the foundation with enough sand to sink the fabric and compress the muck, you may carefully/gently step on the fabric and continue working your way in and around your shape.
- Once you have a few inches across the entire bottom, you can come back and finish sifting the sand to a total depth of 6″ across the entirety of the project.
Frequently Asked Questions About Lake Muck Removal
In Michigan, you can place a reasonable amount of sand on your shoreline above the water’s edge without a permit as long as it doesn’t shift the ordinary high watermark. However, placing sand or fabric below the waterline on an inland lake typically requires approval from Michigan’s Department of Environment, Great Lakes, and Energy (EGLE). We always recommend checking with EGLE or your local DEQ office before starting any work in the water.
When done correctly, a fabric and sand lake bottom will last for decades. We have customers from the late 1990s whose beaches are still in great shape. The key is using a quality breathable fabric, anchoring it properly, and spreading the sand evenly to a full 6 inch depth. Skipping any of those steps is where most DIY projects run into trouble.
This method works regardless of how deep the muck is because you’re not removing the muck at all. You’re covering it with fabric and compressing it under the weight of the sand. We’ve done jobs where the muck was several feet deep and the results hold up the same. The fabric acts as a barrier that keeps the muck below and gives the sand a stable foundation to sit on.
Some minor displacement from waves, wind, and ice is normal over the years, especially on larger lakes with more wave action. That’s why we recommend a minimum of 6 inches of sand depth. On most Michigan inland lakes our customers see very little loss. If you do need to top it off eventually, it’s a simple job compared to the initial installation.
Muck pellets and beneficial bacteria products can reduce muck over time, but results are slow and inconsistent. They work by digesting organic material at the surface of the muck layer. For a swim area you want to actually use this summer, the fabric and sand method gives you immediate results. Some homeowners use pellets as an ongoing maintenance tool alongside a sanded beach, which is a reasonable approach.
For a DIY project on an average sized beach area of roughly 60 by 30 feet, you’re looking at approximately 32 cubic yards of mason sand (around $15 per yard), landscaping fabric, and fence posts. Total materials usually run between $800 and $3,000 depending on size. The big cost is your time and labor since you’ll be moving over 40 tons of sand by wheelbarrow.
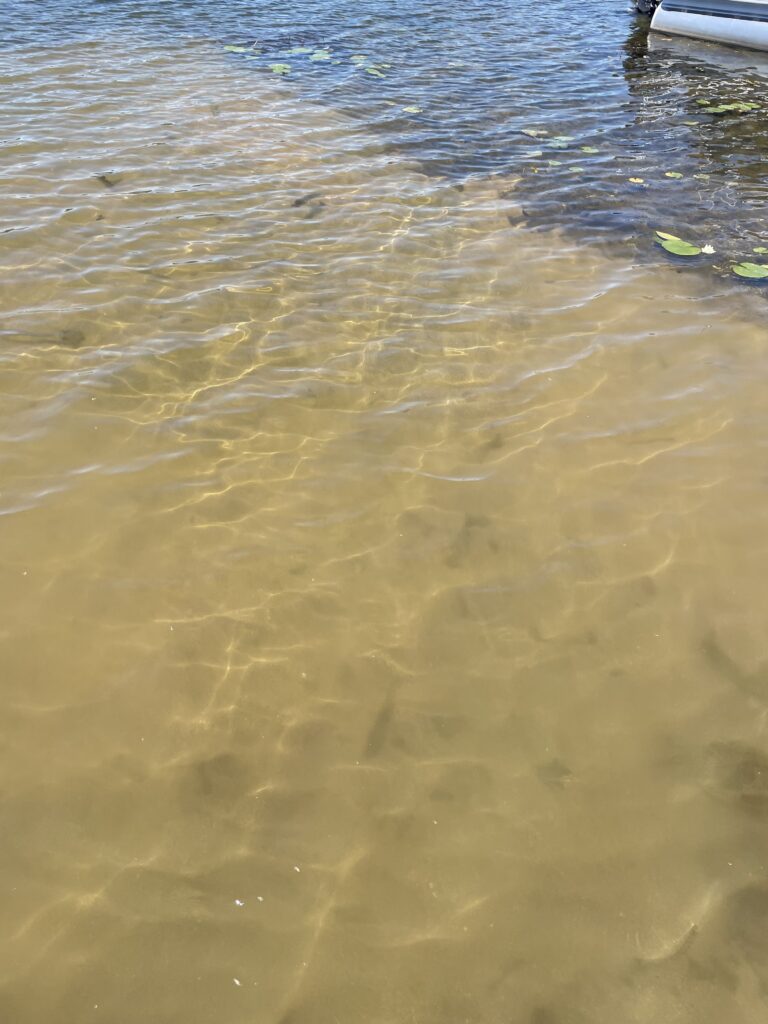
Yes. Once the sand is spread and settled, the area is safe to swim in right away. Mason sand is natural, eco-friendly, and free of contaminants. The fabric underneath is also safe for the lake environment and will not leach anything harmful. Fish will actually benefit from the clean sandy bottom as it creates a good spawning habitat.
Conclusion
We wish you the best of luck with this project and hope this step by step guide to muck mitigation and lake bottom beach stabilization has been helpful! If in the event you have any questions about the process, or would like us to quote the job for you, please don’t hesitate to reach out!
Written by Curt Trierweiler · Curt Trierweiler is co-owner of TT&C Beaches, a Michigan lakefront beach company started by his father Joe in 1978. Curt and his brothers Craig and Chris grew up in the business and have been building, restoring, and sanding beaches on Michigan's inland lakes for over 40 years. When he's not on a job site, Curt is usually out on the water or helping homeowners figure out the best approach for their shoreline.